
|
My favorite products from Amazon! I've been using some of these for over 10 years; when it's good, it's good!
0 Comments
Do you remember how exciting it was to be a little kid and pick out your first day of school outfit? The first time you're going to meet your new teacher and see friends from school since last June; talk about PRESSURE. Well, once you're done with school that excitement is over, right?...
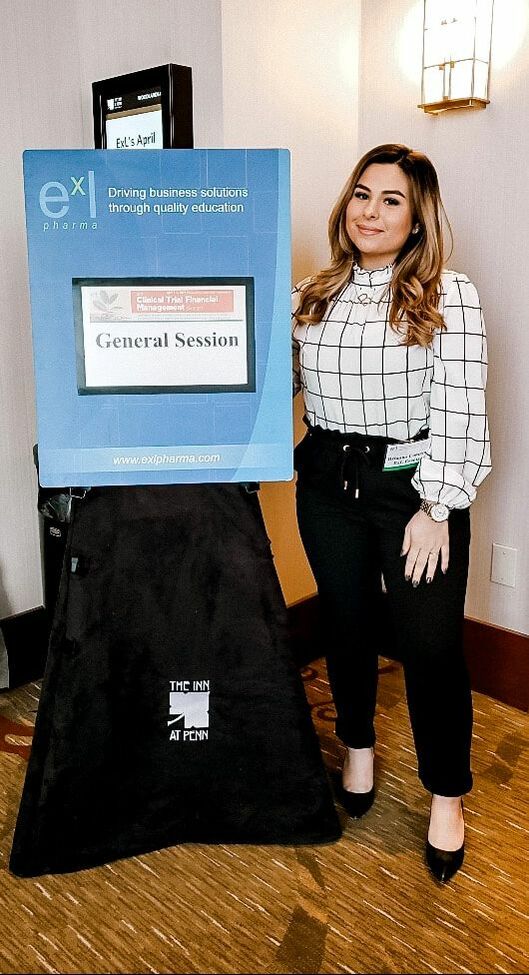
DON'T WORRY! That gut-in-your-butt feeling doesn't go away after you graduate college! Post grad is filled with plenty of nerve wracking firsts that you are going to need a TON of outfits for. After all, first impressions can make or break you! Now, what's another thing every new grad deals with? HAVING ZERO MONIES. And if you're lucky enough to have more than ZERO, you still most likely don't have enough to buy yourself expensive new "work clothes" - as everybody everywhere begins to refer to their classy attire worn Monday-Friday, 9 to 5, and occasionally on a holiday, if you're into that. So, what's the solution? How can you look like a BOSSLADY without spending like one? E A S Y. Amazon Prime, BABIE. Not only are there plenty of cheap options on Amazon, they are GREAT quality AND you can return them for free if you are a Prime member. (Highly suggest; free two-day-shipping is the BEST) I will obviously relate this to myself so: Since we are talking about work clothes let me address you all professionally and properly--
DIY projects don't have to be crafty, they can encompass a multitude of skills and tasks that are commonly done by trained professionals. The great thing about a DIY project is that it costs less than hiring a trained professional and the fact that you get to do-it-yourself adds some of your own personal character to any project you take on! For me, that usually means adding some GLITTER or some over-the-top details, which is actually is part of my personal brand. The purpose of branding yourself is to convey an image or feeling that is consistent to your target audience. I have been a student for most of my life, so how I think of branding from a student perspective is like thinking of the main idea when writing a paper. You introduce the main idea in the first paragraph, relate back to the main idea in each of the body paragraphs, and then tie it all together again in the conclusion. When you are trying to create a brand it is important to make sure your 'main idea' is consistent and that you reference this idea in some way/shape/form in all your marketing content. The reason for creating a personal brand can be different for each person. For a college student, they may want to create a personal brand that attracts prospective employers. Conversely, business owners (small or large) may want to establish a brand that attracts future employees. Regardless of your motivations, the one statement that is true for anybody trying to brand themselves is this; personal brands can create a great amount of value.
Step 3: Review your content. Edit your content to ensure that it relates to your main idea. Something that a lot of people make mistakes with is overlooking the details. When you look at the big picture things may make sense, but if somebody from your target audience is looking at just one piece of content will your brand image still come across? It is important to look at things independently and ask yourself that question. Now that you've developed a brand you can look at your previous posts, images, or copy and make small edits that help tie it back to your aesthetic. If you're starting your brand for the first time then you can create a 'brand board' to help keep your image on track. Check out the example I've made for a friend's small business, The Gifts Concierge. 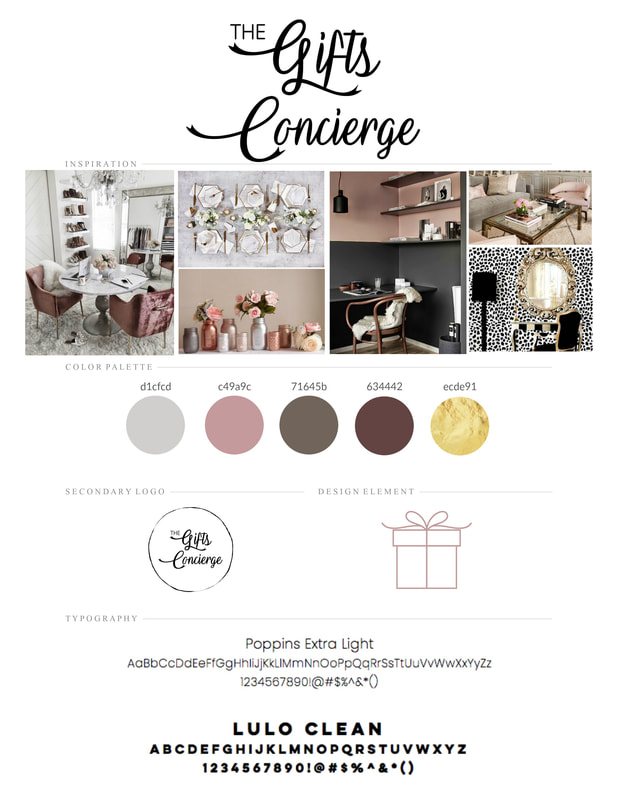 Once you've done these steps you're ready to get started in the long haul! Your DIY marketing is going to be one of your GREAT successes! The most important thing with branding yourself is to stay active. If your're posting content on social media platforms try to come up with a weekly schedule of when you're going to post things. If you're blogging or making YouTube videos the same principle applies, having a consistent schedule helps your audience know when to expect new content and keeps them engaged. If you have specific questions about your branding or need some personalized tips send an email to [email protected].
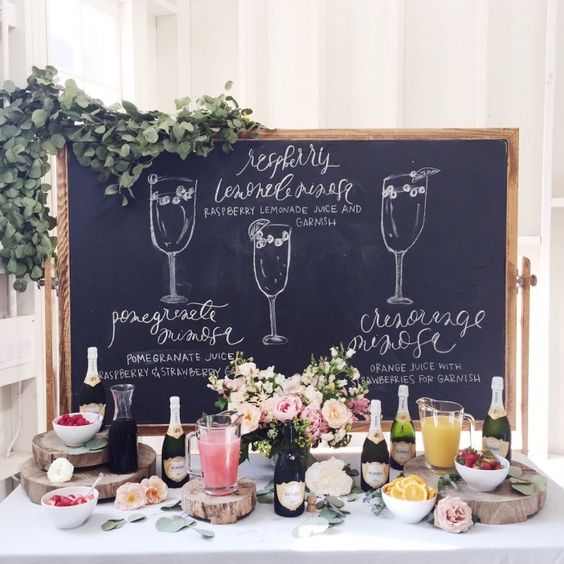
Everybody loves brunch; that’s practically a fact! What’s so amazing about brunch compared to literally any other meal is that there’s kinda no rules! You can have some breakfast foods, some lunch foods, maybe themed cuisine, and of course ALCOHOL! Brunch is so versatile, which means you can host one for any event or just because you want a reason to get dressed up and have fun! I have outlined the essentials as an informal ‘how to’ guide for your hosting pleasure!
DRINKS
YASS, give the people what they want! No brunch is complete without drinks. The obvious go-to's are mimosas and bloody marys (mouth starts watering) but the list doesn't have to stop there! Having lots of options for your guests doesn't have to be expensive either! All you need is a few essentials: champagne, vodka, tequila, and rum. The options are endless with these four alcohol choices. Add some juice pitchers and fresh cut fruit on the side to create a self-serve bar where guests can make drinks as they please! 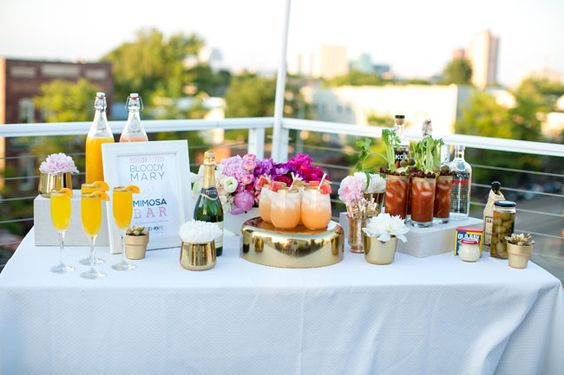
One decor idea that could be a little more time consuming would be creating a photo booth / selfie section for guests. Not only do they look SO CUTE but they also make your brunch totally INSTAWORTHY! Everybody is about to know that you truly are a host extraordinaire because those pics are just TOO good.
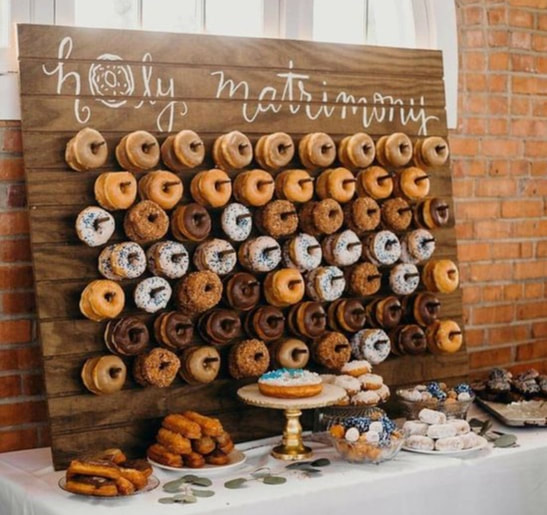
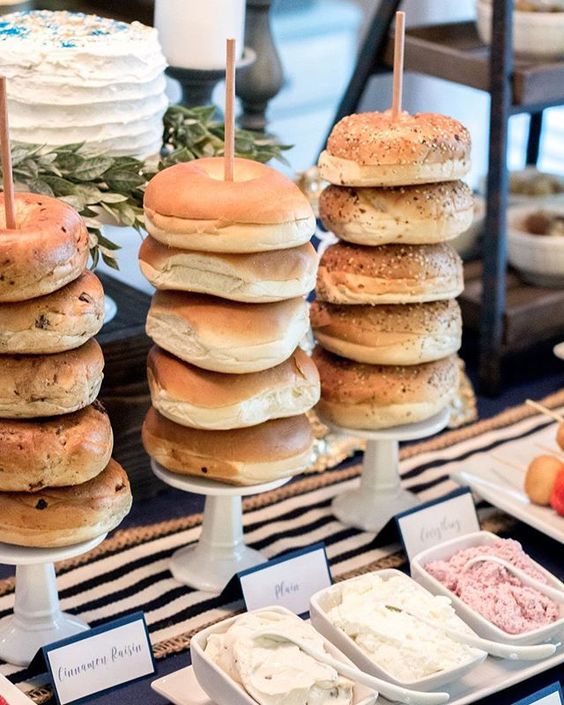
Knock out two birds with one stone with a gorgeous display for some of your brunch munchies! Hang up some donuts or bagels for a true wow-factor that is bound to grab your guests attention!
Now you're ready! Send out those e-vites because this is one party your friends DO NOT want to miss!
For more inspo and ideas check out my BRUNCH Pinterest board!
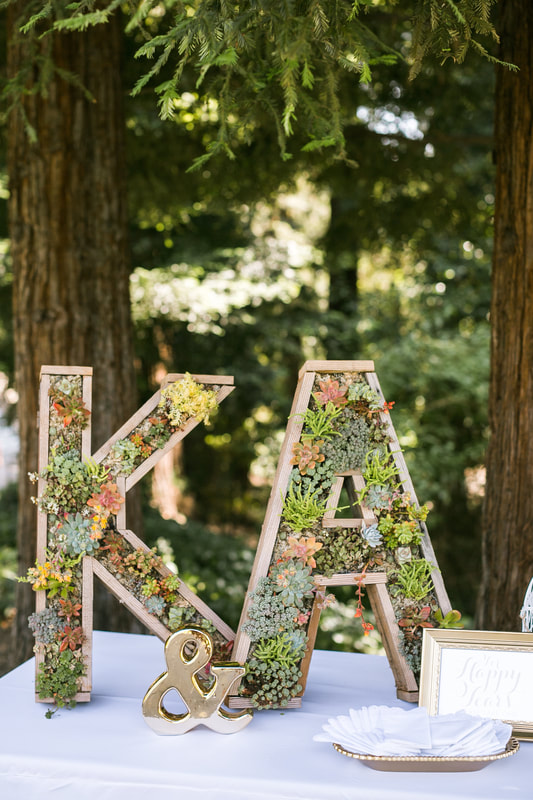
If you haven't seen tons of cute succulent arrangements lately, you MUST be living under a rock! These adorable little plants are so diverse! Not only is each plant different from the next, but they could also be used in so many aspects of an event! From favors and centerpieces to table seating and event accents, these little wonders are not only eye catching but also BUDGET FRIENDLY! Check out these ideas and see for yourself!
WHAT YOU'LL NEED & WHERE TO BUY IT
SUCCULENTS: Buy in BULK or individually! If you are having a smaller event you can find succulents at any garden center (Walmart, Home Depot, Lowes) usually around $2 each. If you are having a larger event or need more than 20, I suggest buying in bulk. You can do this on AMAZON! Click here for my favorite succulents!
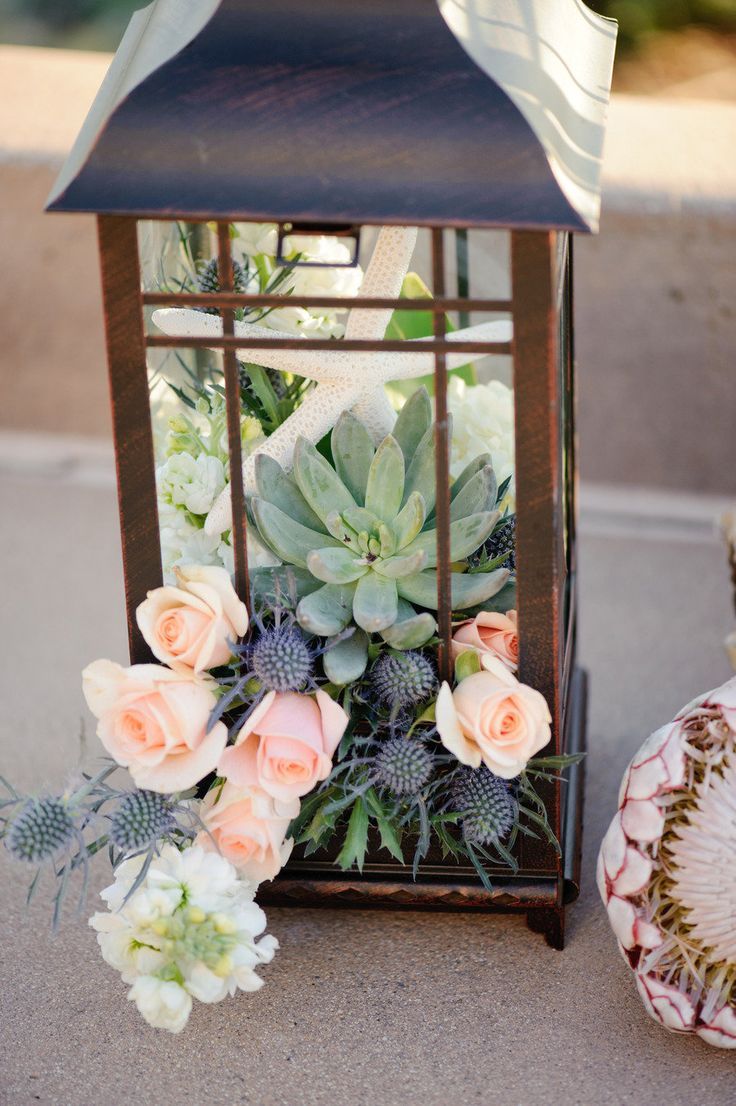
PLANTERS: Like I said, think outside the box! Mason jars, tumblers, champagne glasses, antique cups, ANYTHING! You could even paint mini ceramic pots to fit in your color pallet! Click here for an example of cute planters for favors or table seating!
For more inspiration and DIY guides look on our Pinterest board!
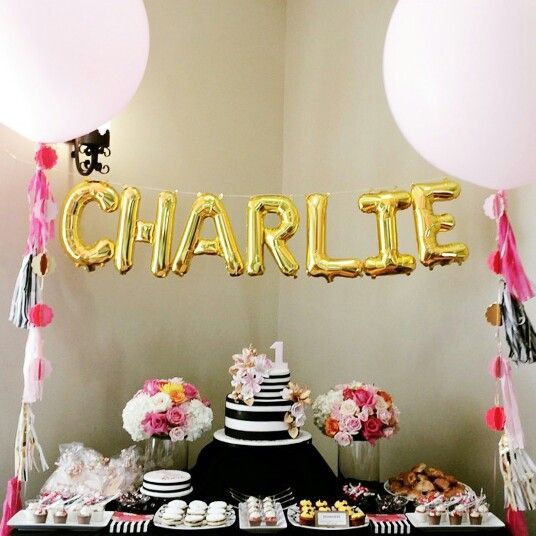
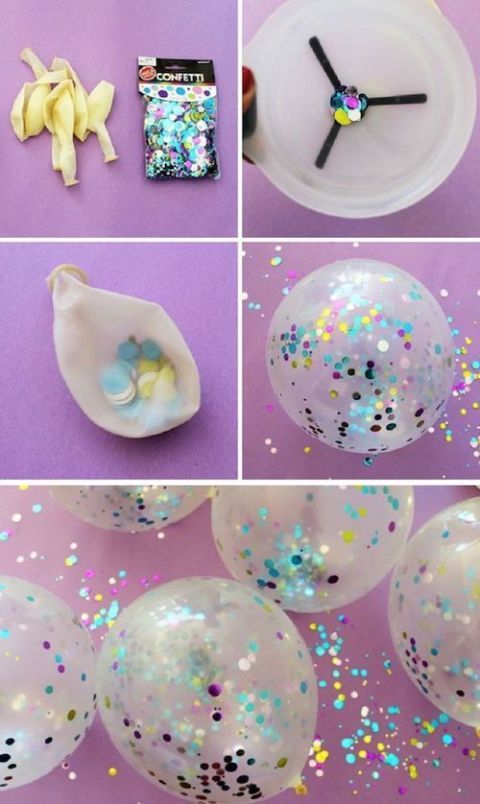
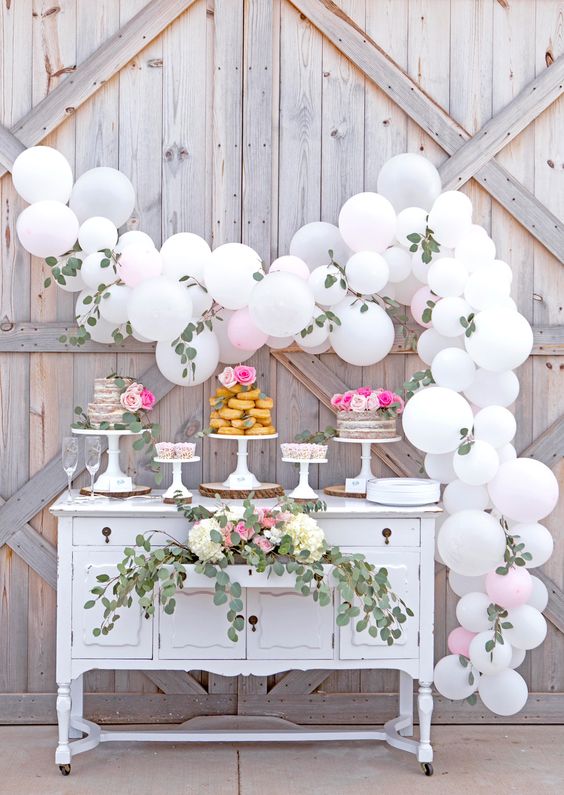
Partying on a budget? NO PROBLEM! Balloons are the easiest and cheapest way to add a little something extra to any event! They make the perfect backdrop for an impromptu photo booth, a 'fancy' alternative to a boring paper banner, or just some extra fluff to top off your color scheme!
|
authorI like to think of this as a DIY MANIFESTO! You don't have to be an event planner to put together an amazing party; who says you need a degree in design to decorate?! Not a fashion blogger but want to post your fire OOTD? DO IT. Flip a HOUSE... okay maybe just rearrange your some furniture. categories |


 RSS Feed
